 CareCard
Reviewing Institution Access Requests
How to approve, reject, or ask for more information on access requests for your program.
When a student, intern, or volunteer requests access to a program you coordinate, their request lands on your Requests page. There you approve it, reject it, or ask for more information.
You are not the only reviewer. Requests is shared with the Institution Admins and Campus Admins who cover the same students, so any of you can act on the same request.
The Requests Page
Each row is one access request.
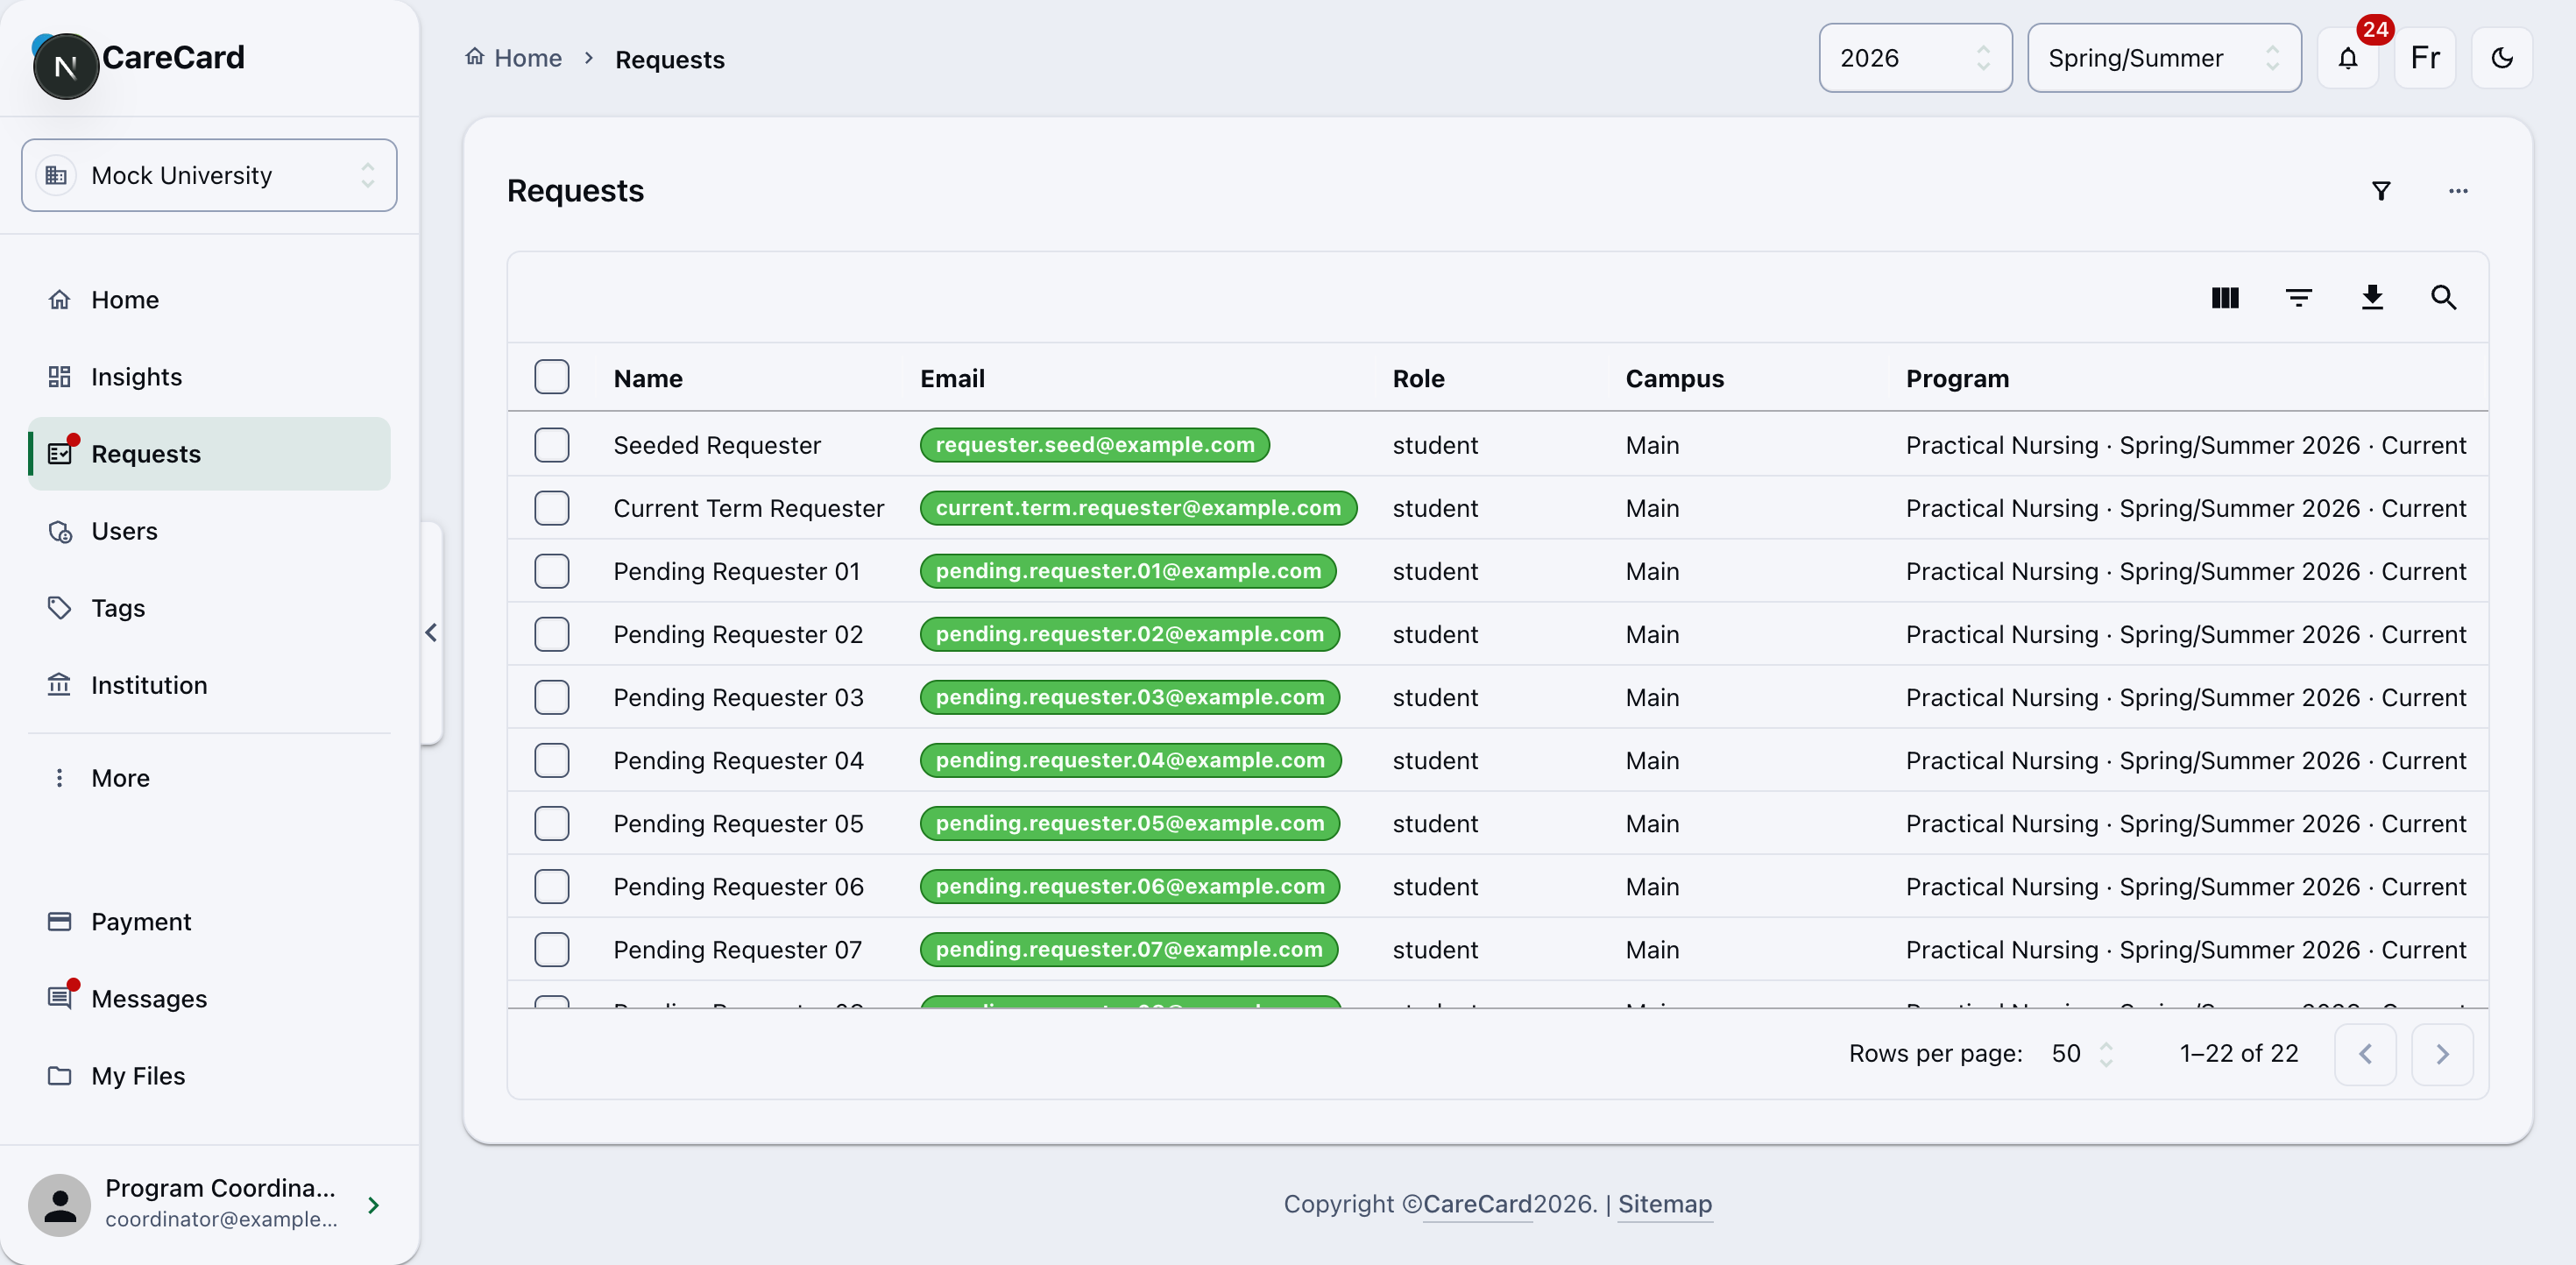
Two details aren't obvious at a glance:
- The Email chip is colour-coded — Green means the requester's email domain matches yours. Amber means it does not, so you can spot someone signing up with a personal address.
- The Program column carries its term — It shows the term and how that term
relates to today, such as
Practical Nursing · Spring/Summer 2026 · Current, or Future, Past, or Term unavailable.
Filtering by Status
The queue shows one status at a time. Use the Status filter () above the table to switch between them:
| Filter | What it means |
|---|---|
| Pending | Waiting for a decision |
| Info needed | Paused while you wait for the requester |
| Approved | Program access is active |
| Rejected | The request was not granted |
| Expired | No decision was made before the request expired |
Only rows in the status you are viewing can be selected. Switching the filter clears your current selection.
Deciding on a Request
Tick one or more rows, then open the Action menu (⋯) above the table. The choices depend on the status you're viewing:
| Viewing | Actions available |
|---|---|
| Pending | Approve, Reject, Info Needed |
| Info needed | Approve, or move back to Pending |
| Approved, Rejected, Expired | Hide only, to clear it from your view |
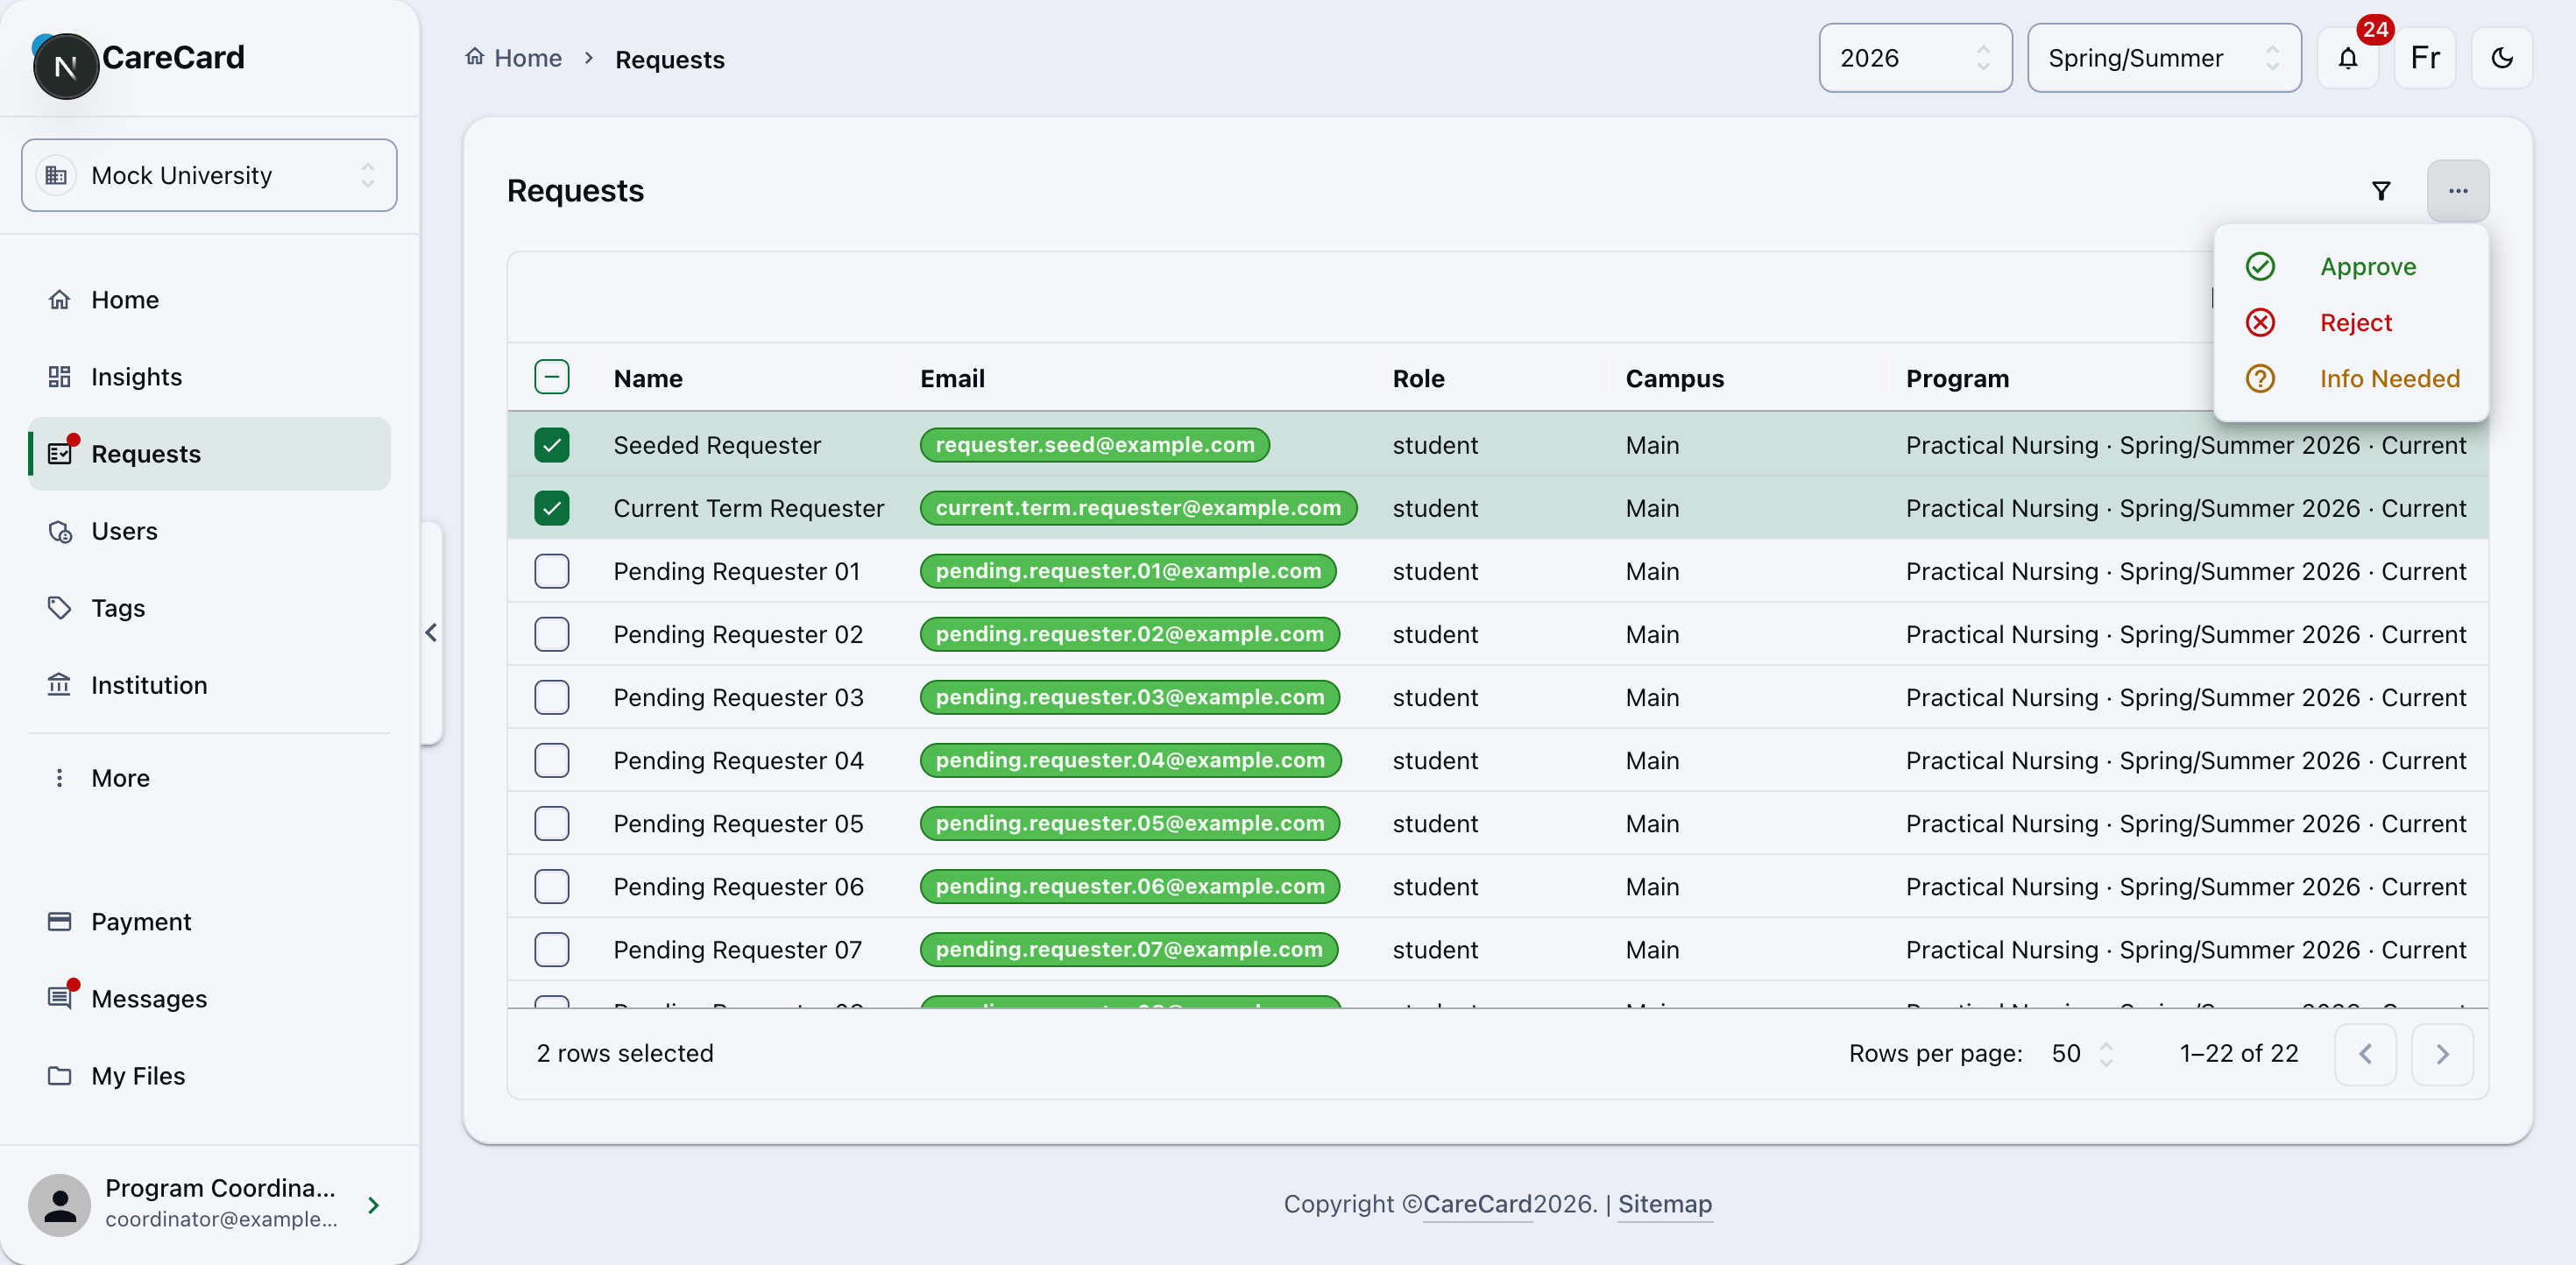
Picking an action asks you to confirm in the Confirm request action dialog. Acting on several at once opens a Bulk update progress dialog — use Cancel Remaining to stop partway.
You can't approve a request for a past or unavailable term. Remove it from your selection to enable Approve.
Info Needed pauses a request without closing it. Message the requester to say what's missing. It stays in your queue until a reviewer moves it back to Pending.
After You Approve
Once a request is Approved, that person's program access is active. You can follow what they submit from Checking Student Submissions.
Already know who is enrolling? Pre-Approving Students clears their requests automatically, skipping this queue.