 CareCard
Setting Program Requirements
How requirement items, templates, and program templates fit together to create the checklist your students see.
Build the requirements list that students see in three steps. The tools are under More in the side menu.
How the Three Parts Work Together
You build the list in three steps, and each step uses a different page:
- Requirement Item — One document you can ask for, such as a CPR certificate. It carries its own validity in days, or Never expires.
- Template — A named bundle of requirement items, such as Clinical Compliance.
- Program Template — The assignment that says "this program, this term, uses this template."
Only the assignment (Step 3) makes requirements appear. An item or an unassigned template reaches no one, and assignments are per term — each new term needs its own.
Step 1 — Requirement Items
Open Requirement Items. It shows every document type you can ask for. Each row lists its scope, requirement types, universal code, category code, and how long it stays valid.
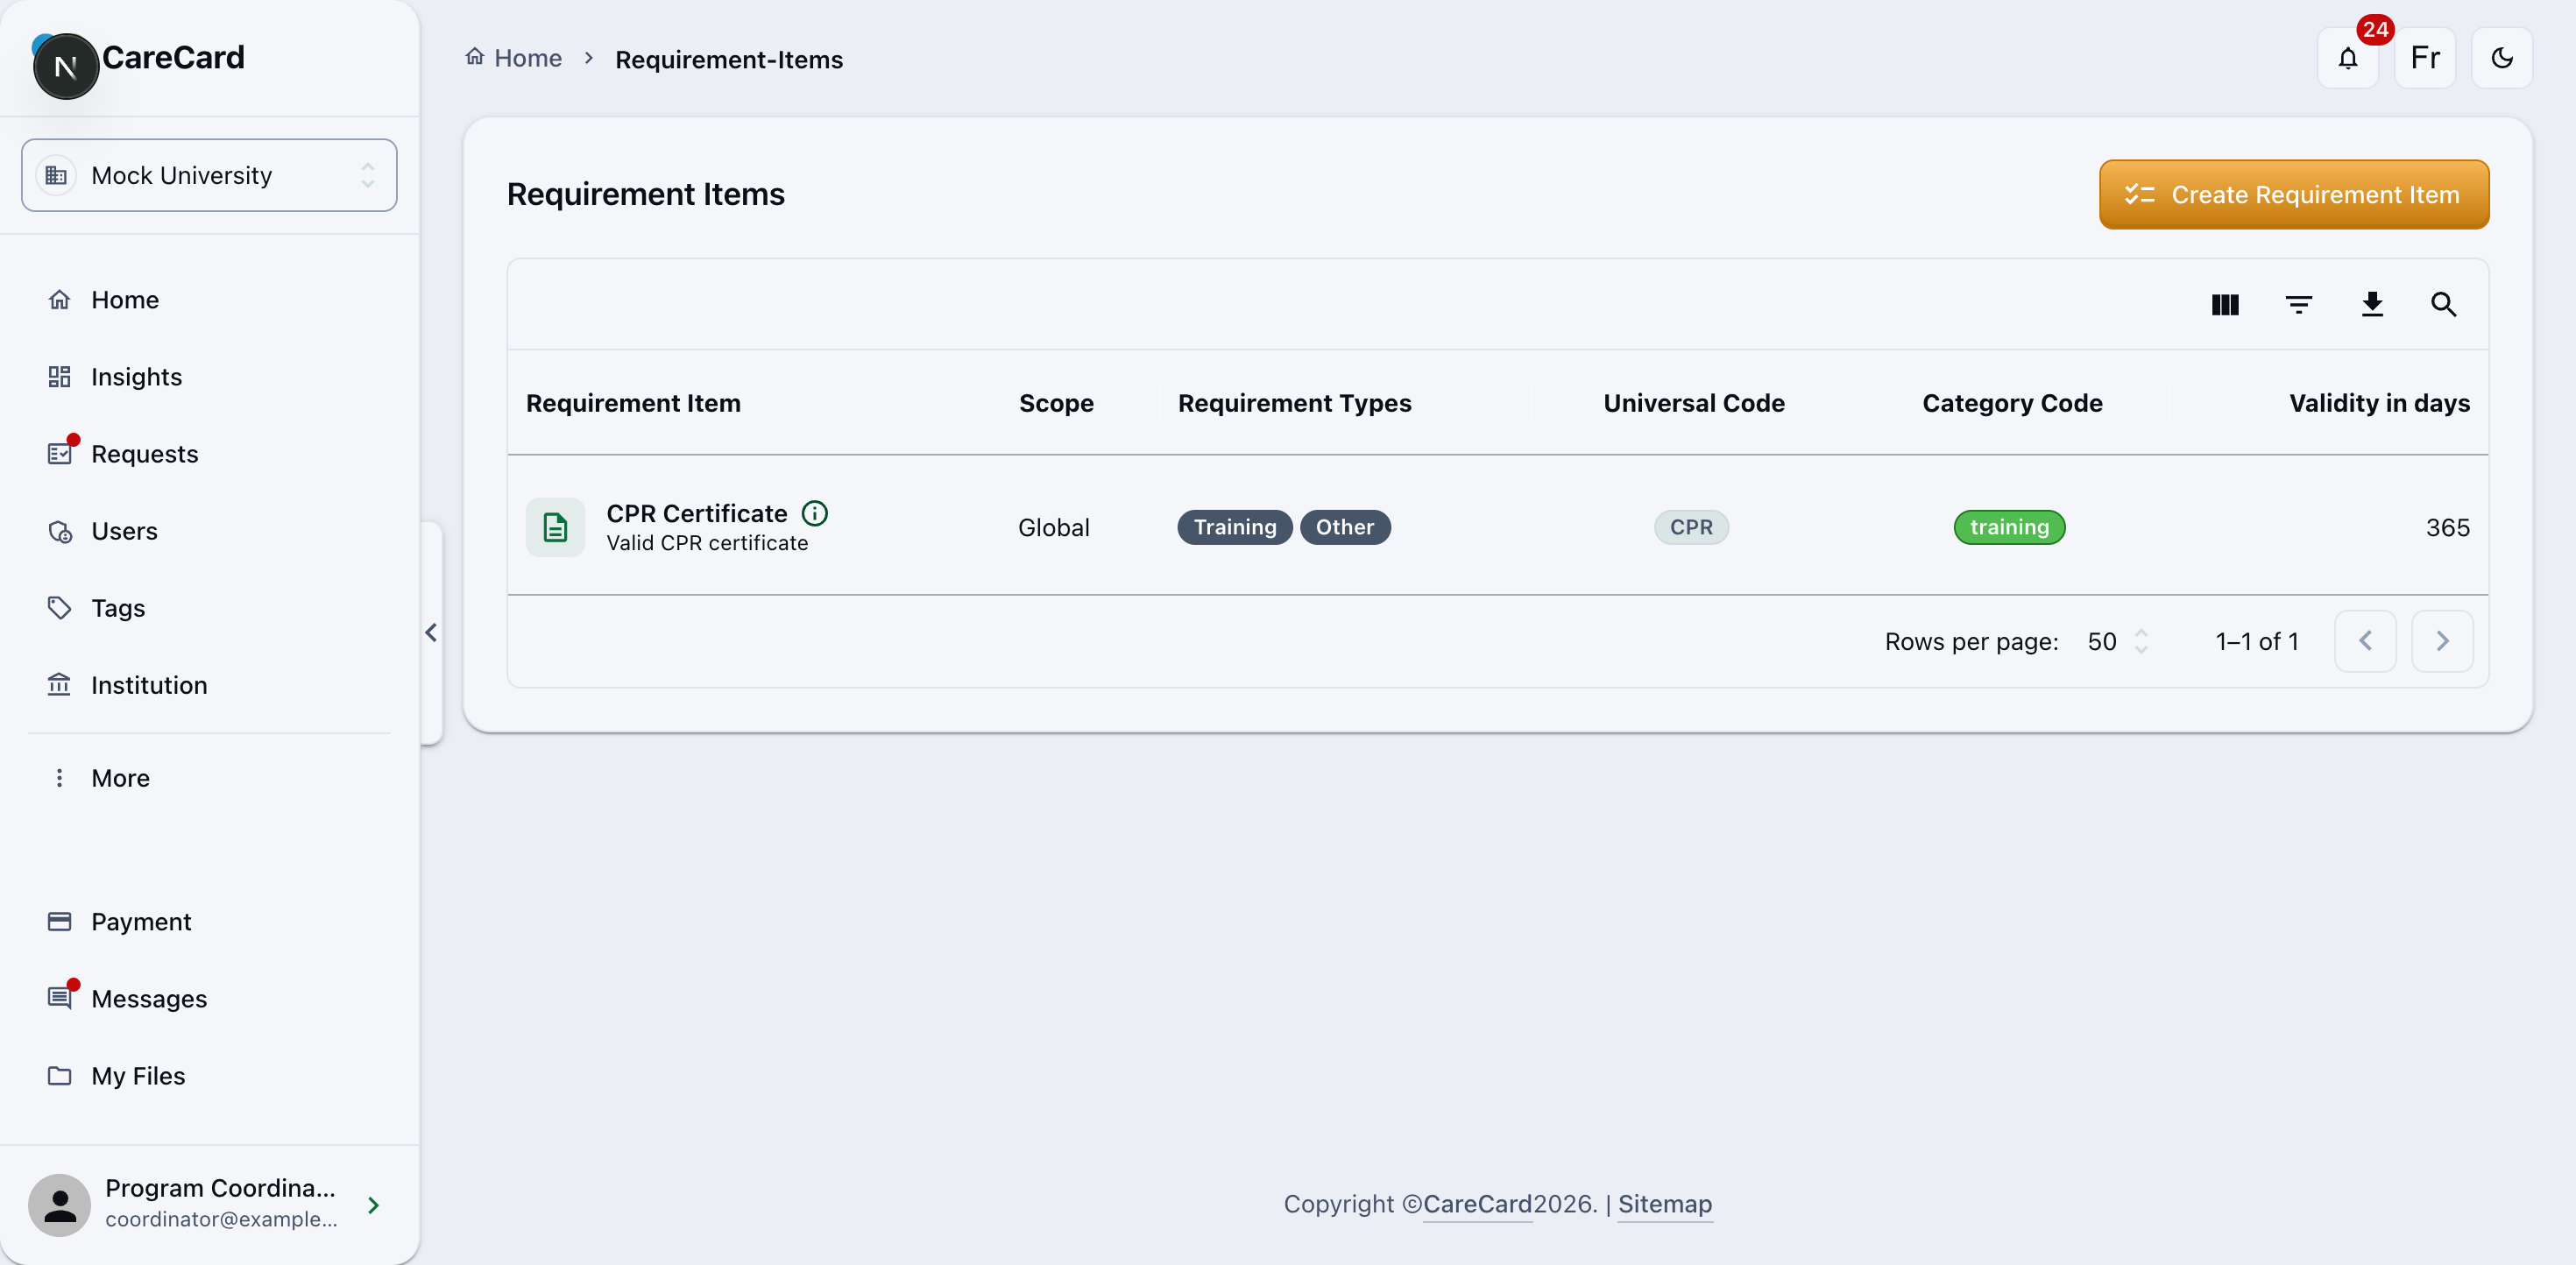
Select Create Requirement Item to add one:
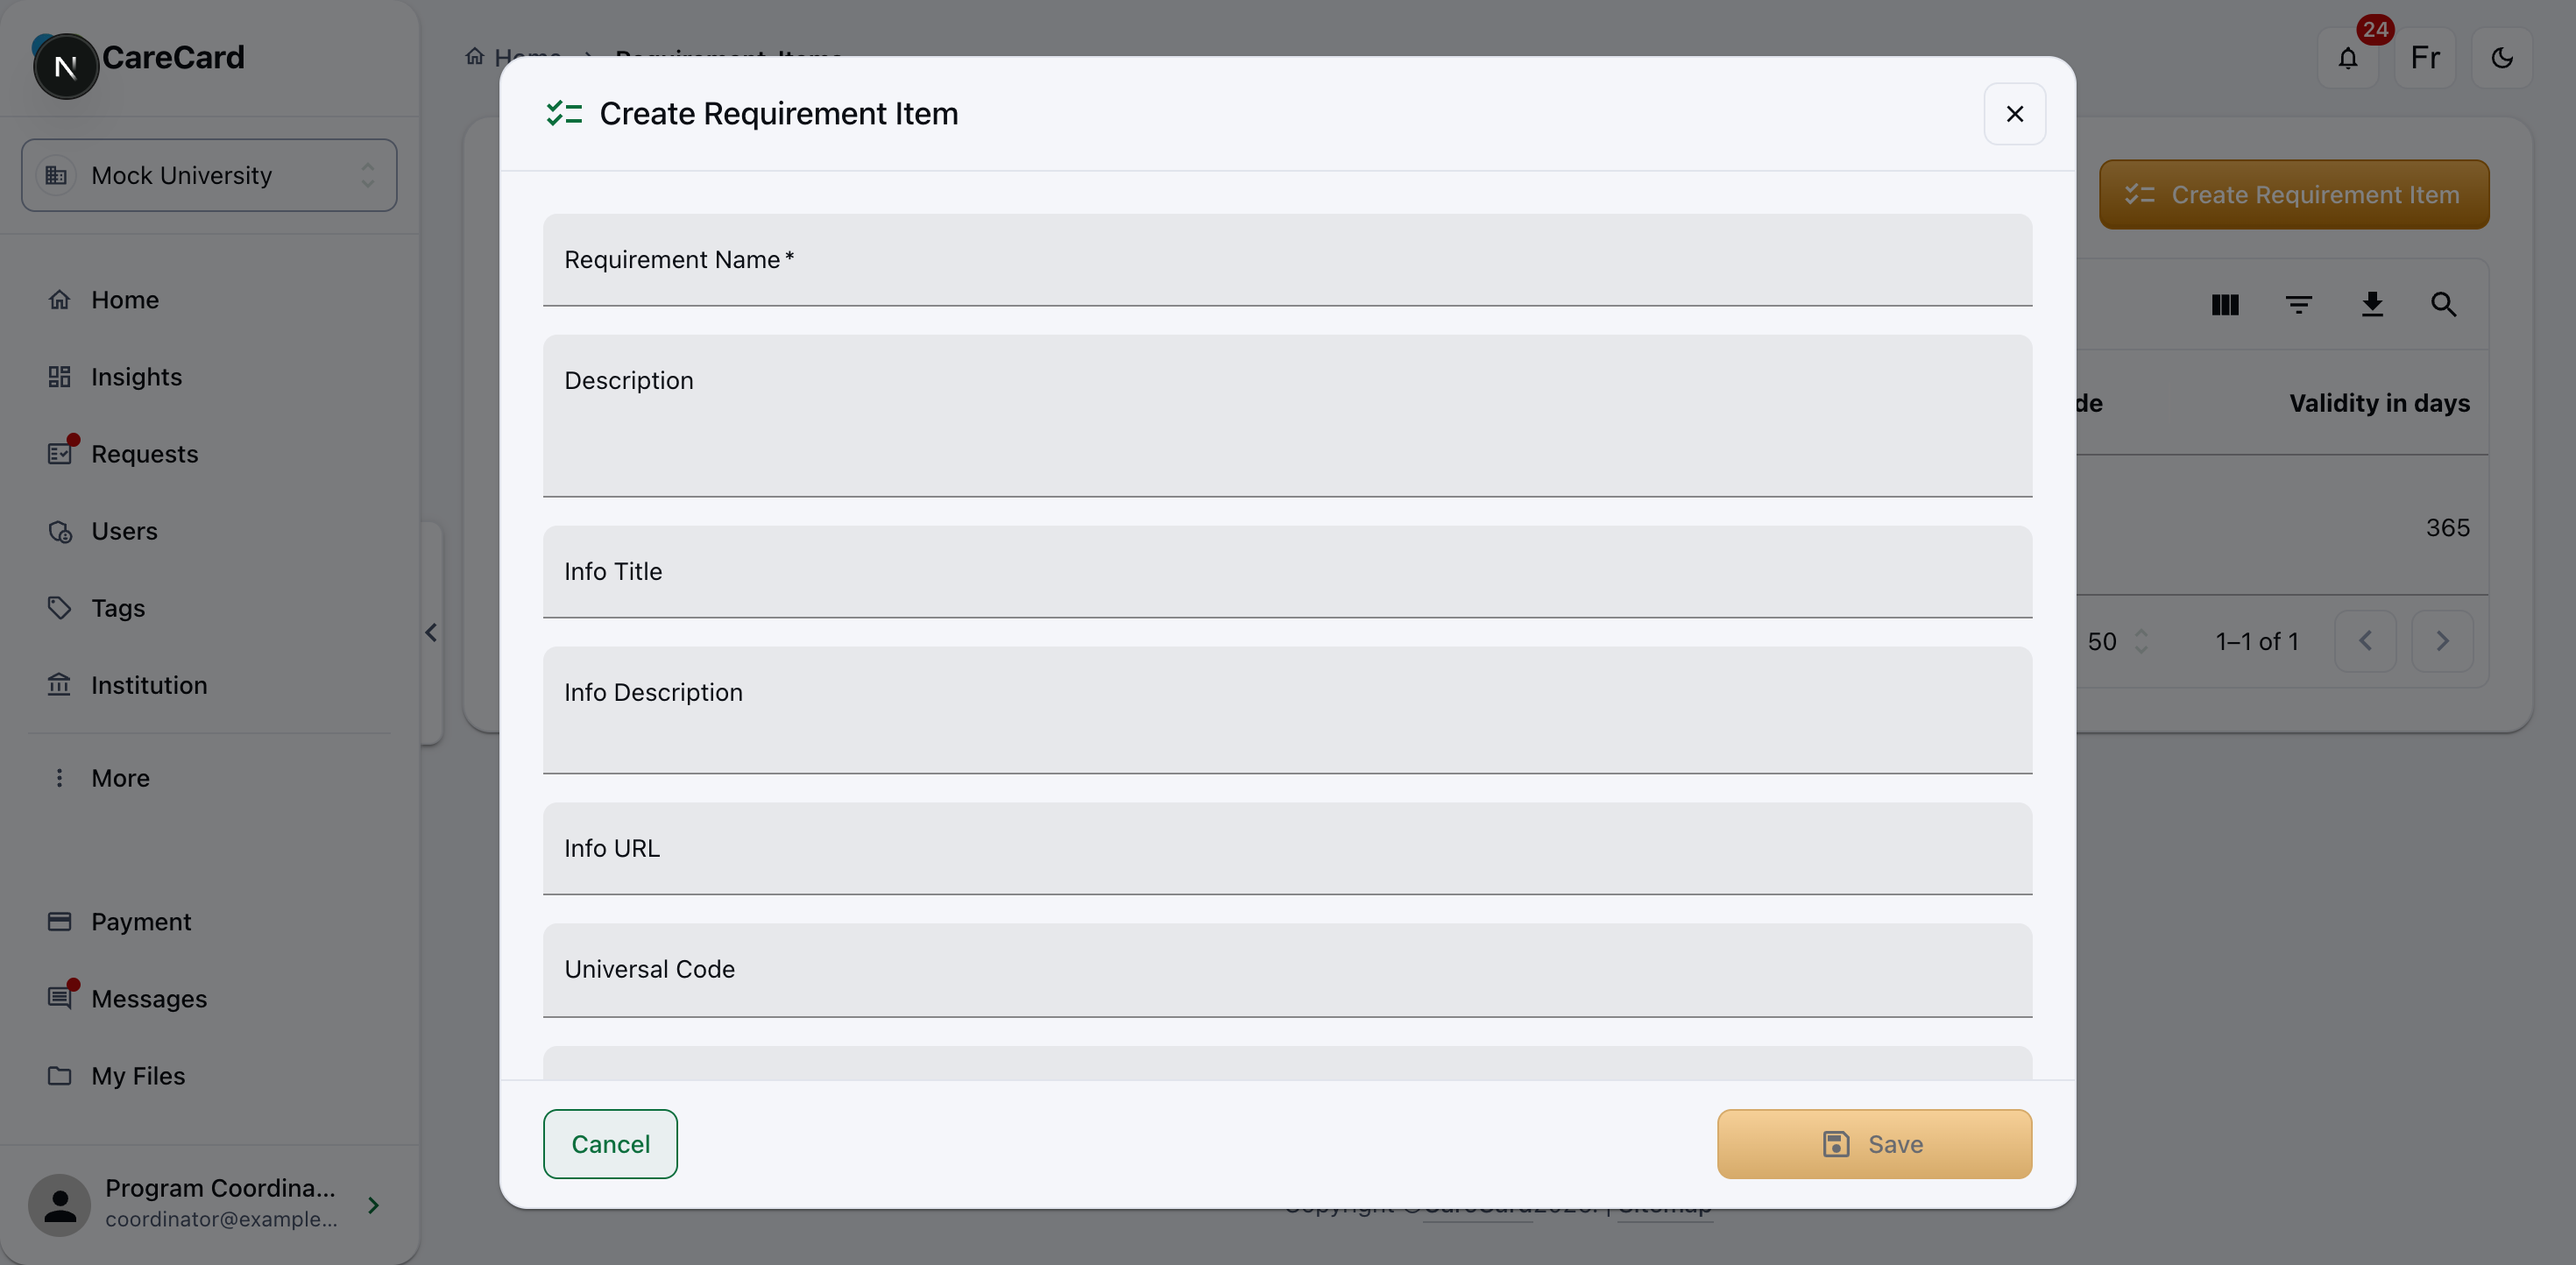
- Requirement Name and at least one Requirement Type are required.
- Set a Validity in days (365 for an annual certificate) or tick Never expires.
- Info Title, Info Description, and Info URL guide students who open the requirement. A link to your own instructions saves messages later.
- Universal Code and Universal Category Code line the same document type up across institutions.
The ⋯ menu offers Update and Delete, but only on rows you can manage.
Step 2 — Templates
Open Templates. A Template is the bundle assigned to your students.
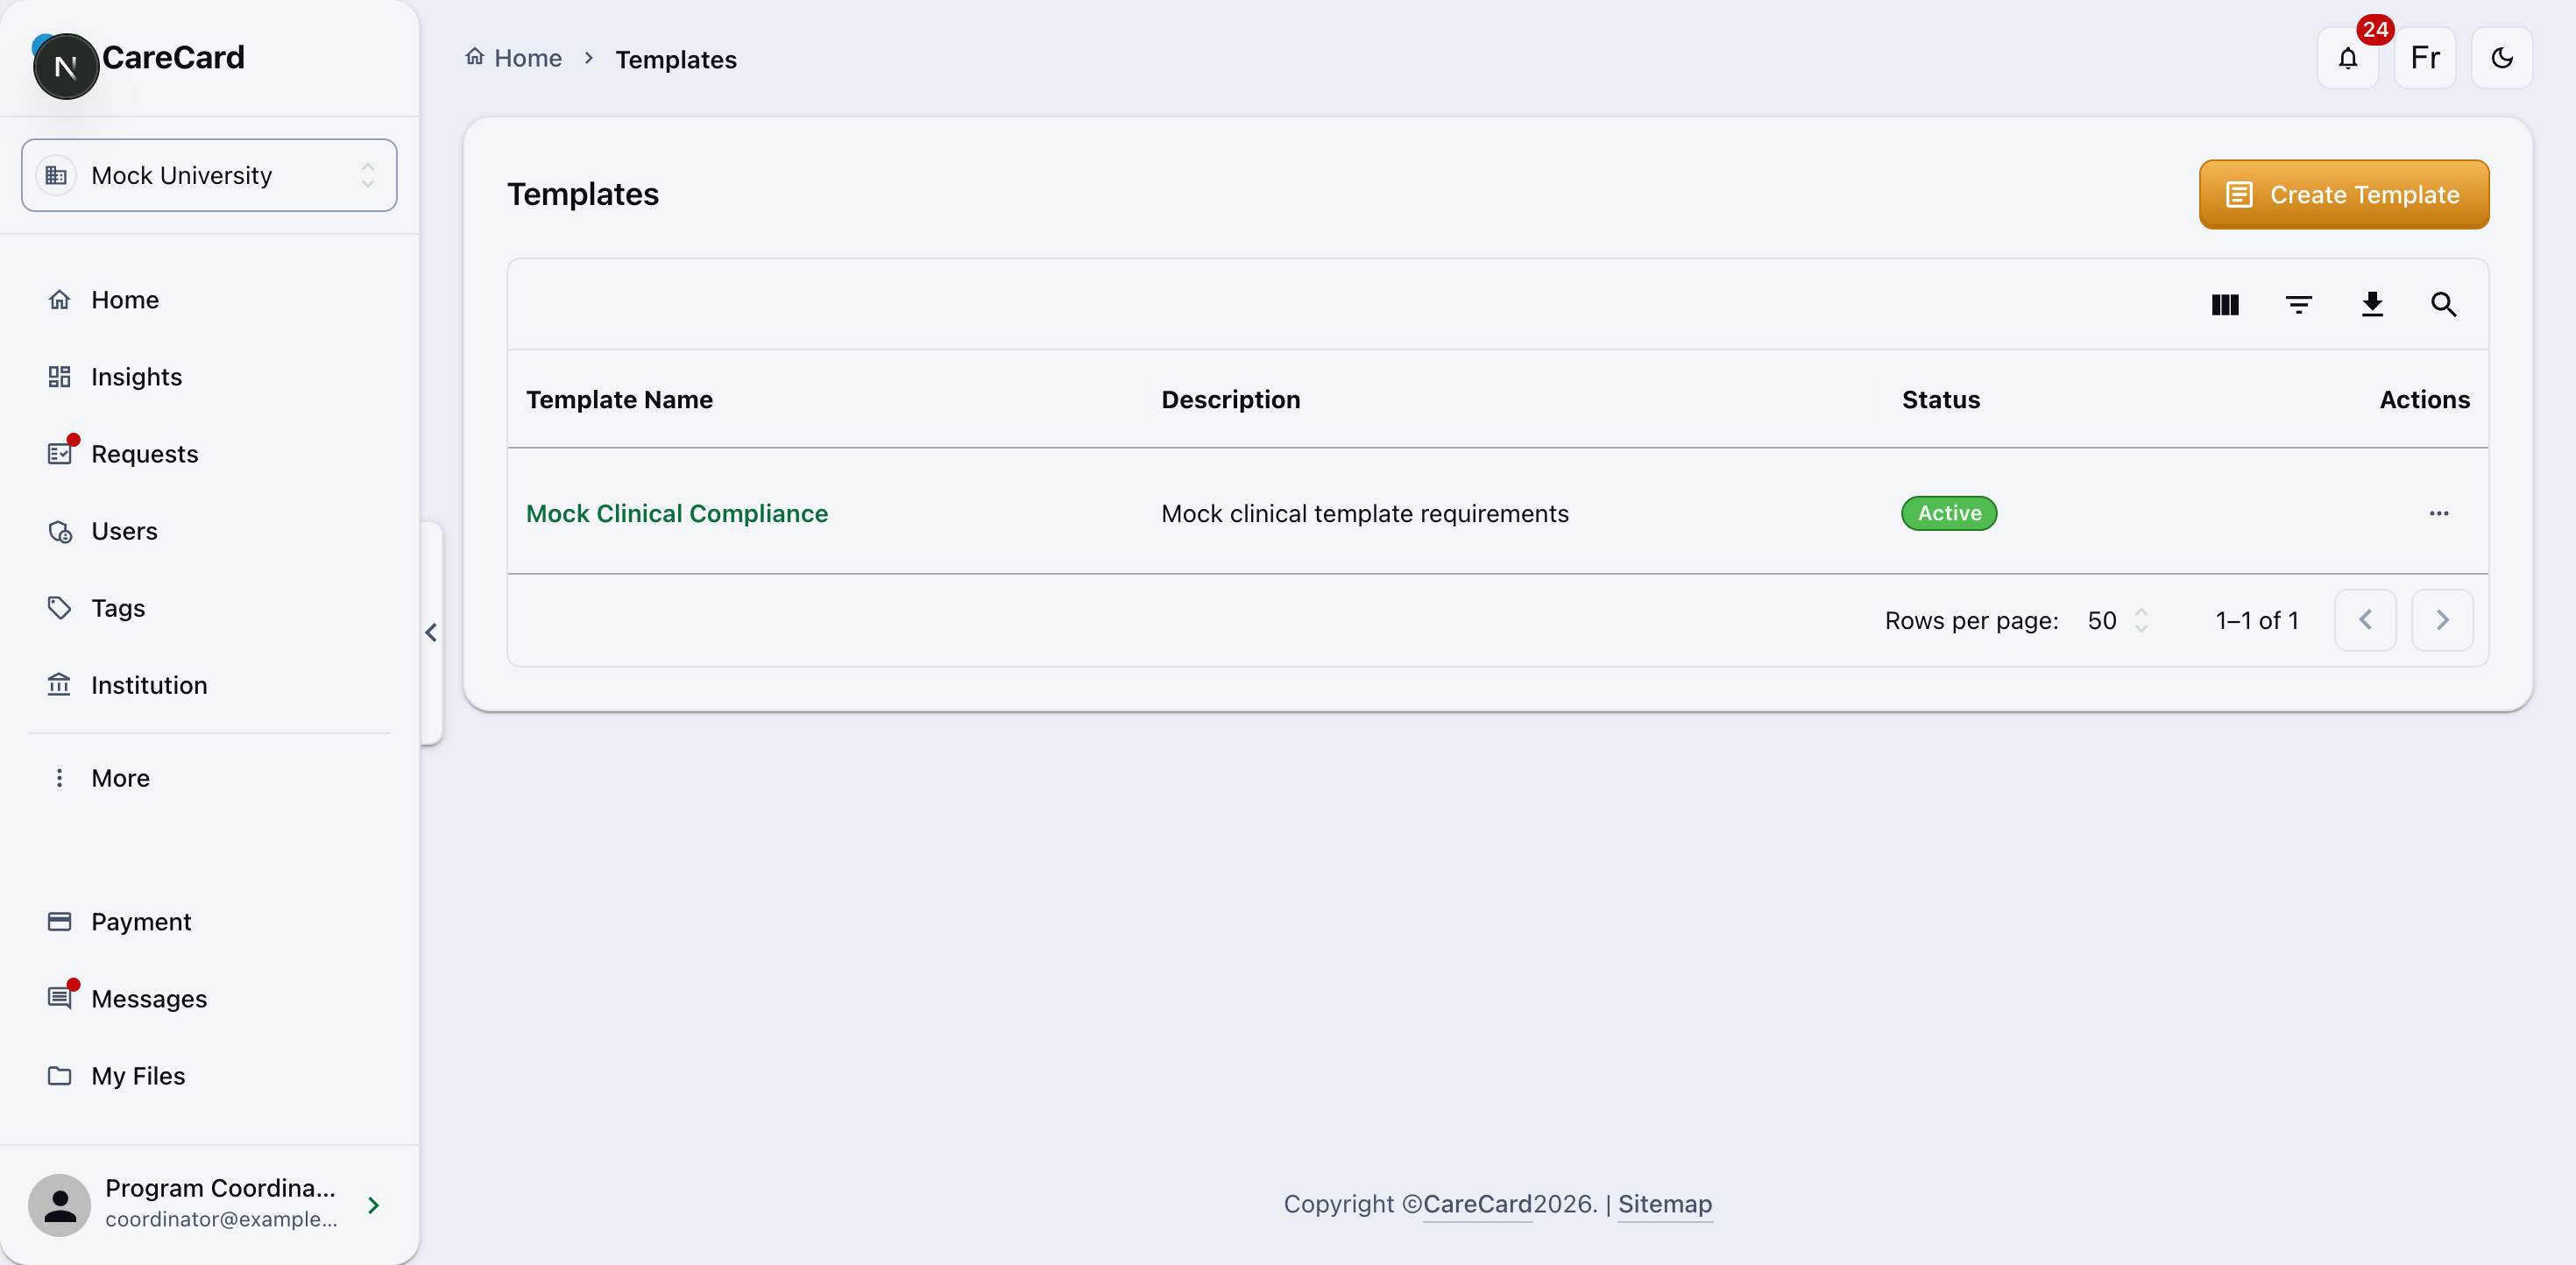
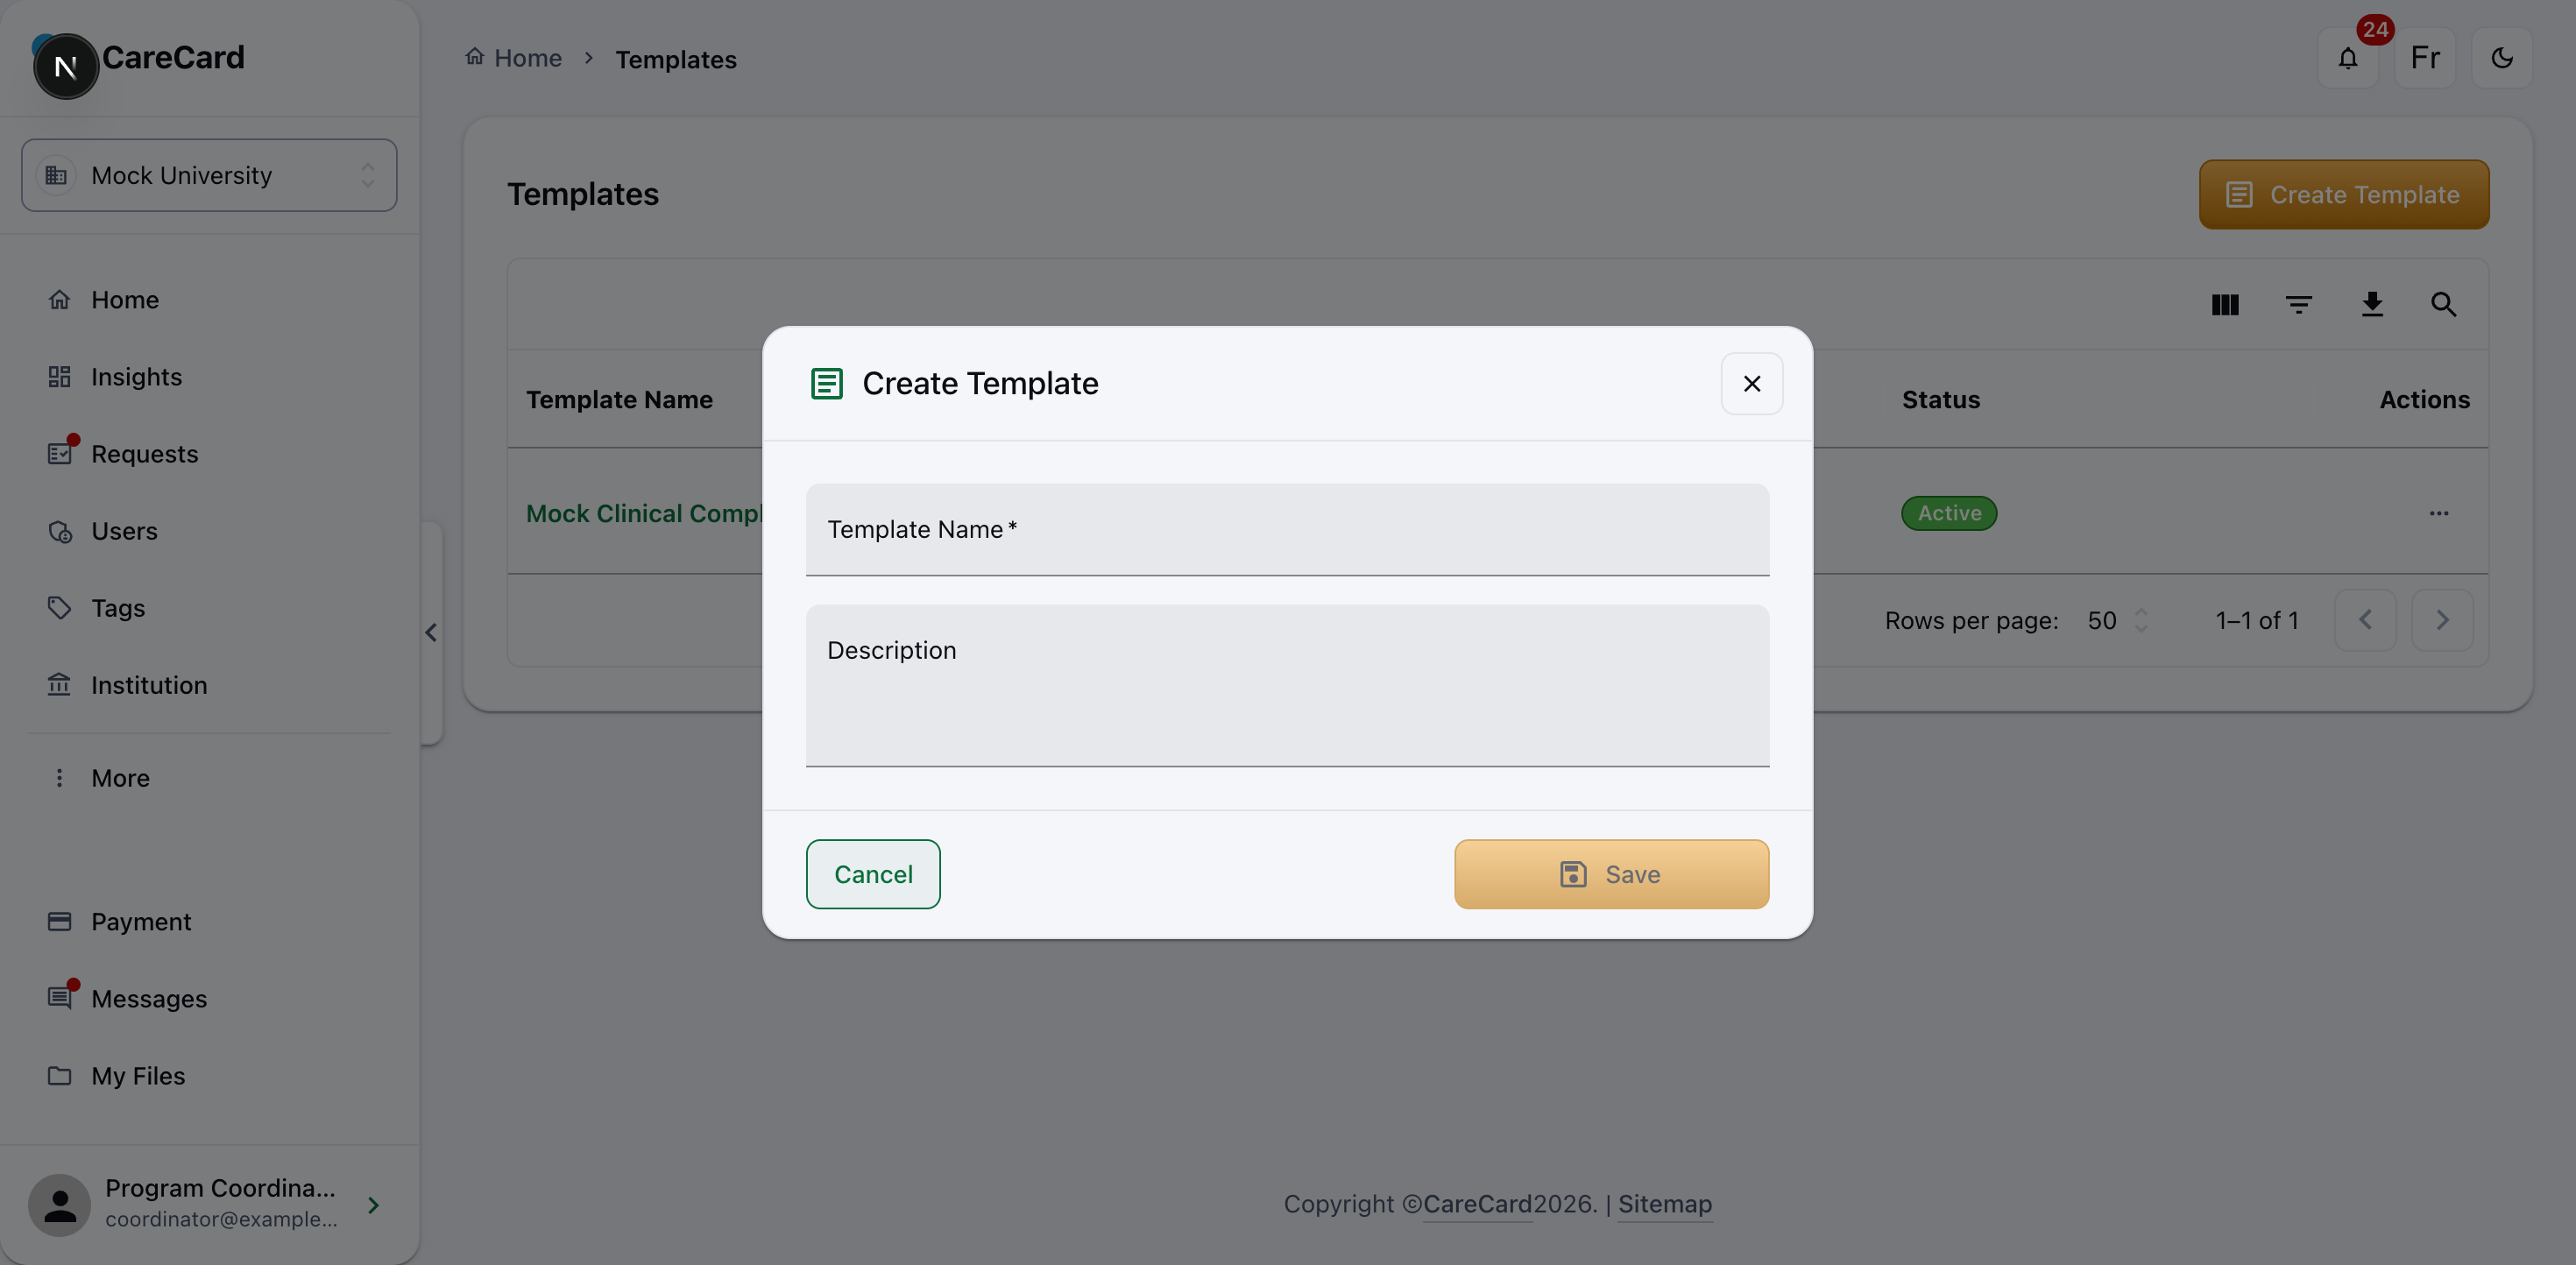
Select Create Template, give it a Template Name and Description, and save:
Then open the template by clicking its Template Name, and use Add Requirement Items to pick which items belong to it. Each row's ⋯ menu has Delete to remove an item.
Build one template per compliance set rather than one per intake. You can assign a template to several programs and terms, so reuse it instead of creating duplicates.
Step 3 — Assign it to your program
Open Program Templates and assign a template to a program and term.
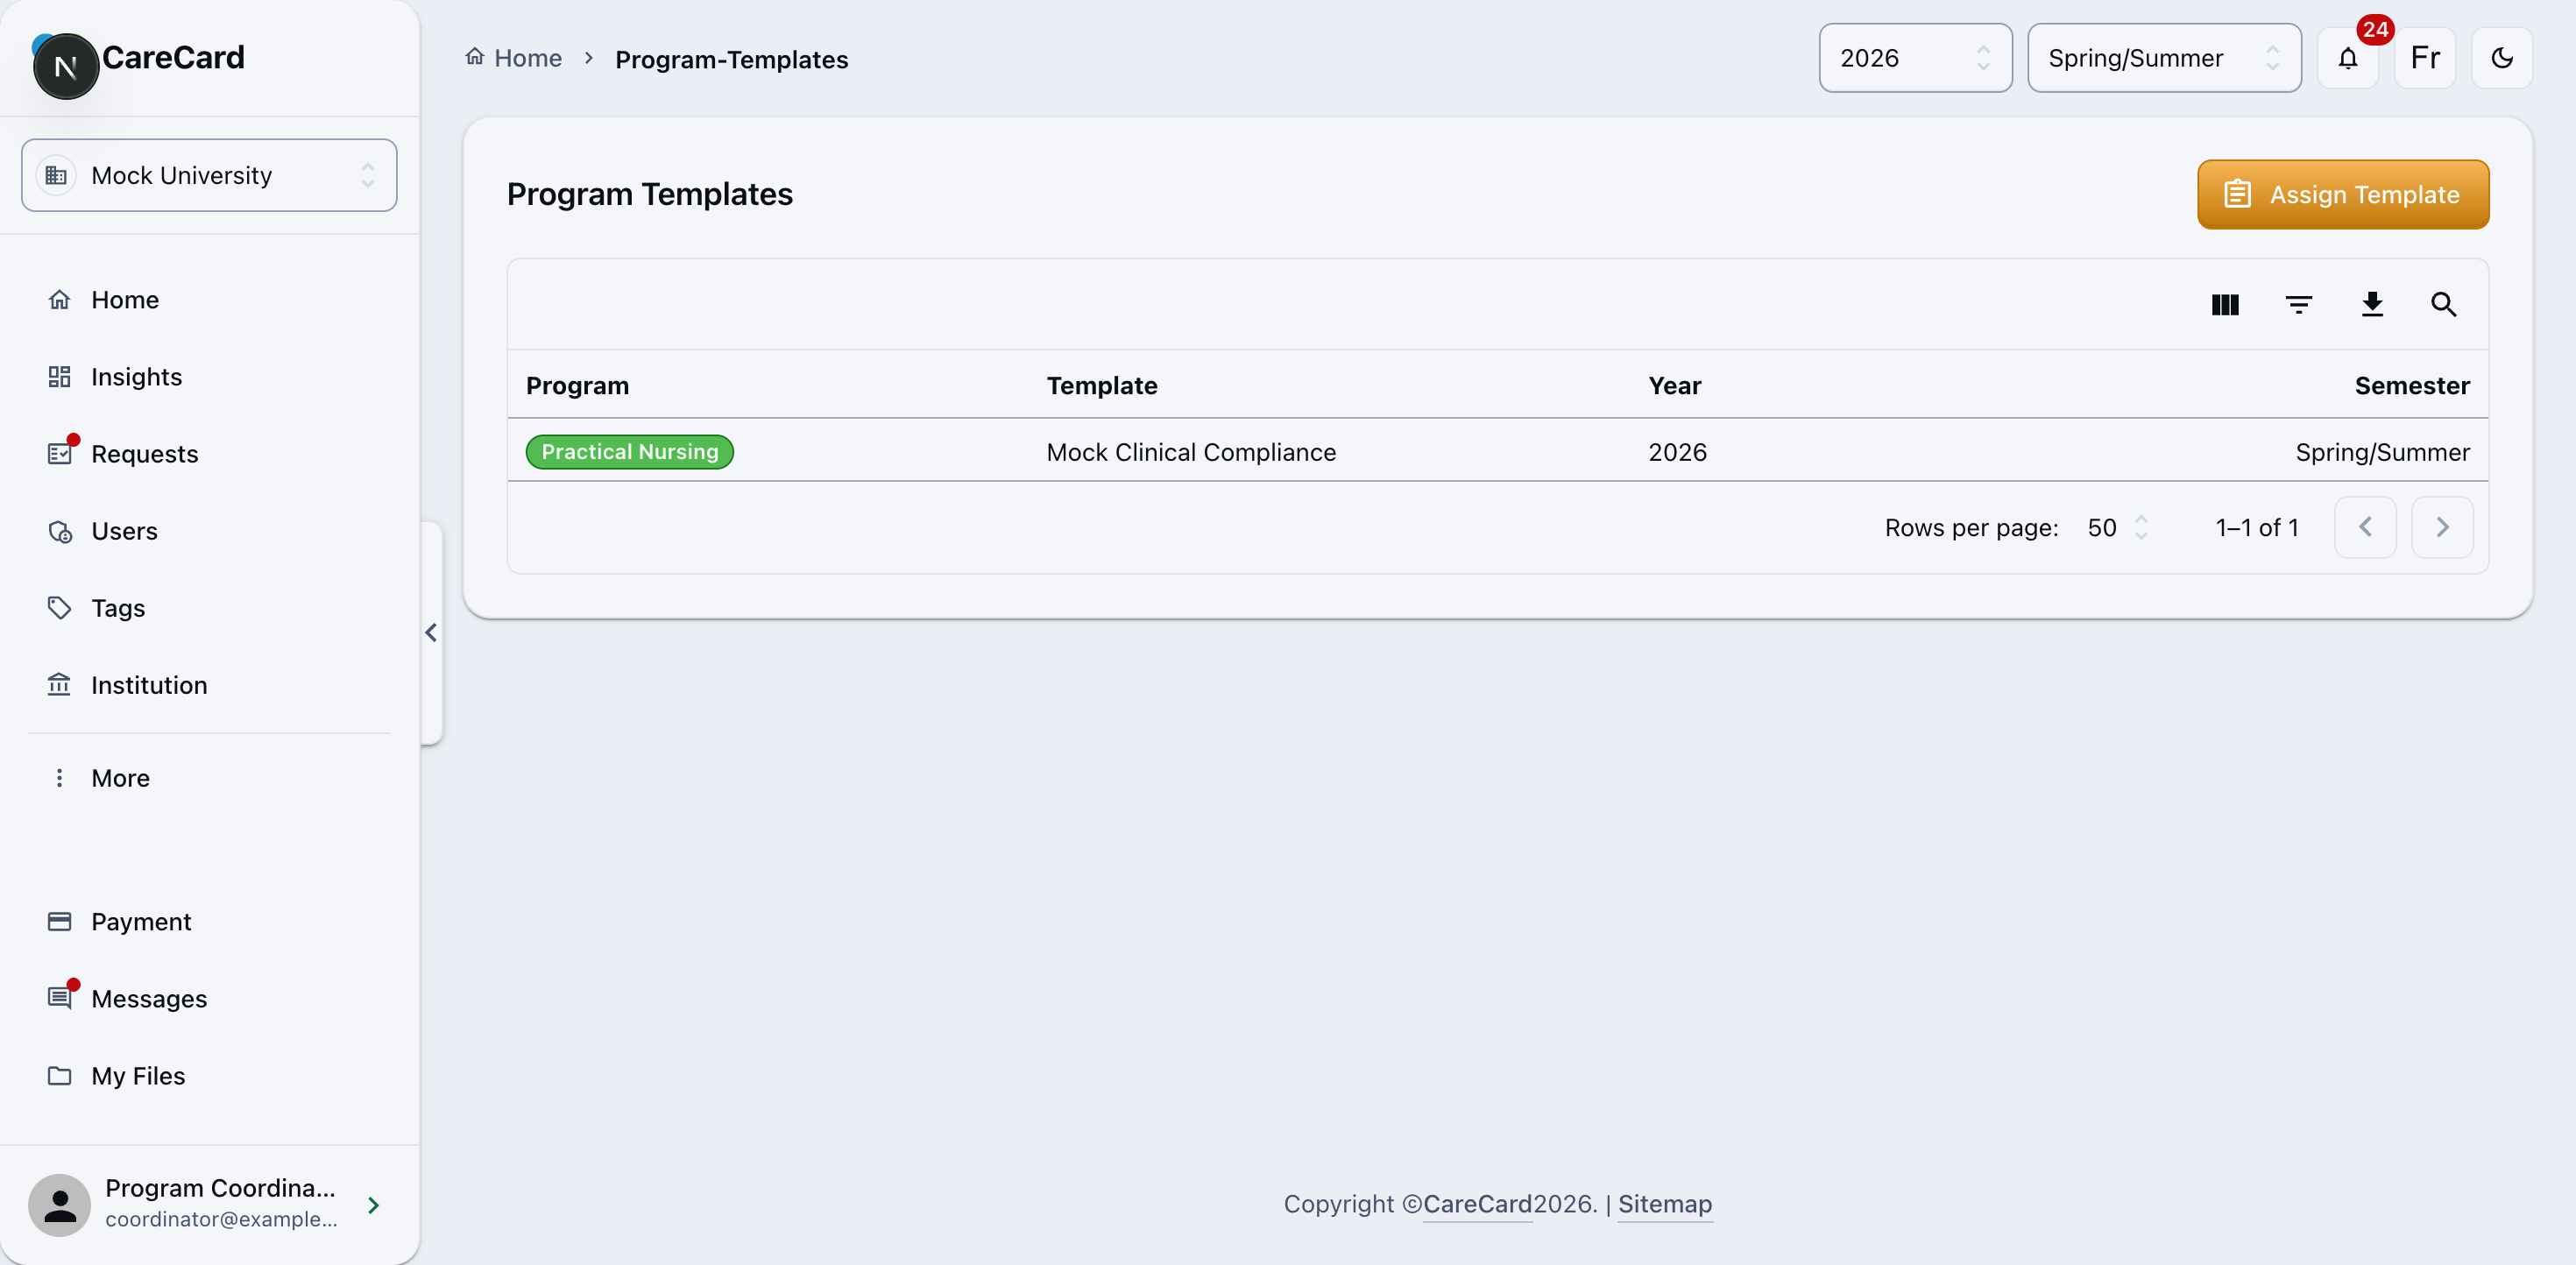
Select Assign Template, choose the Program, Template, Year, and Semester, then Save:
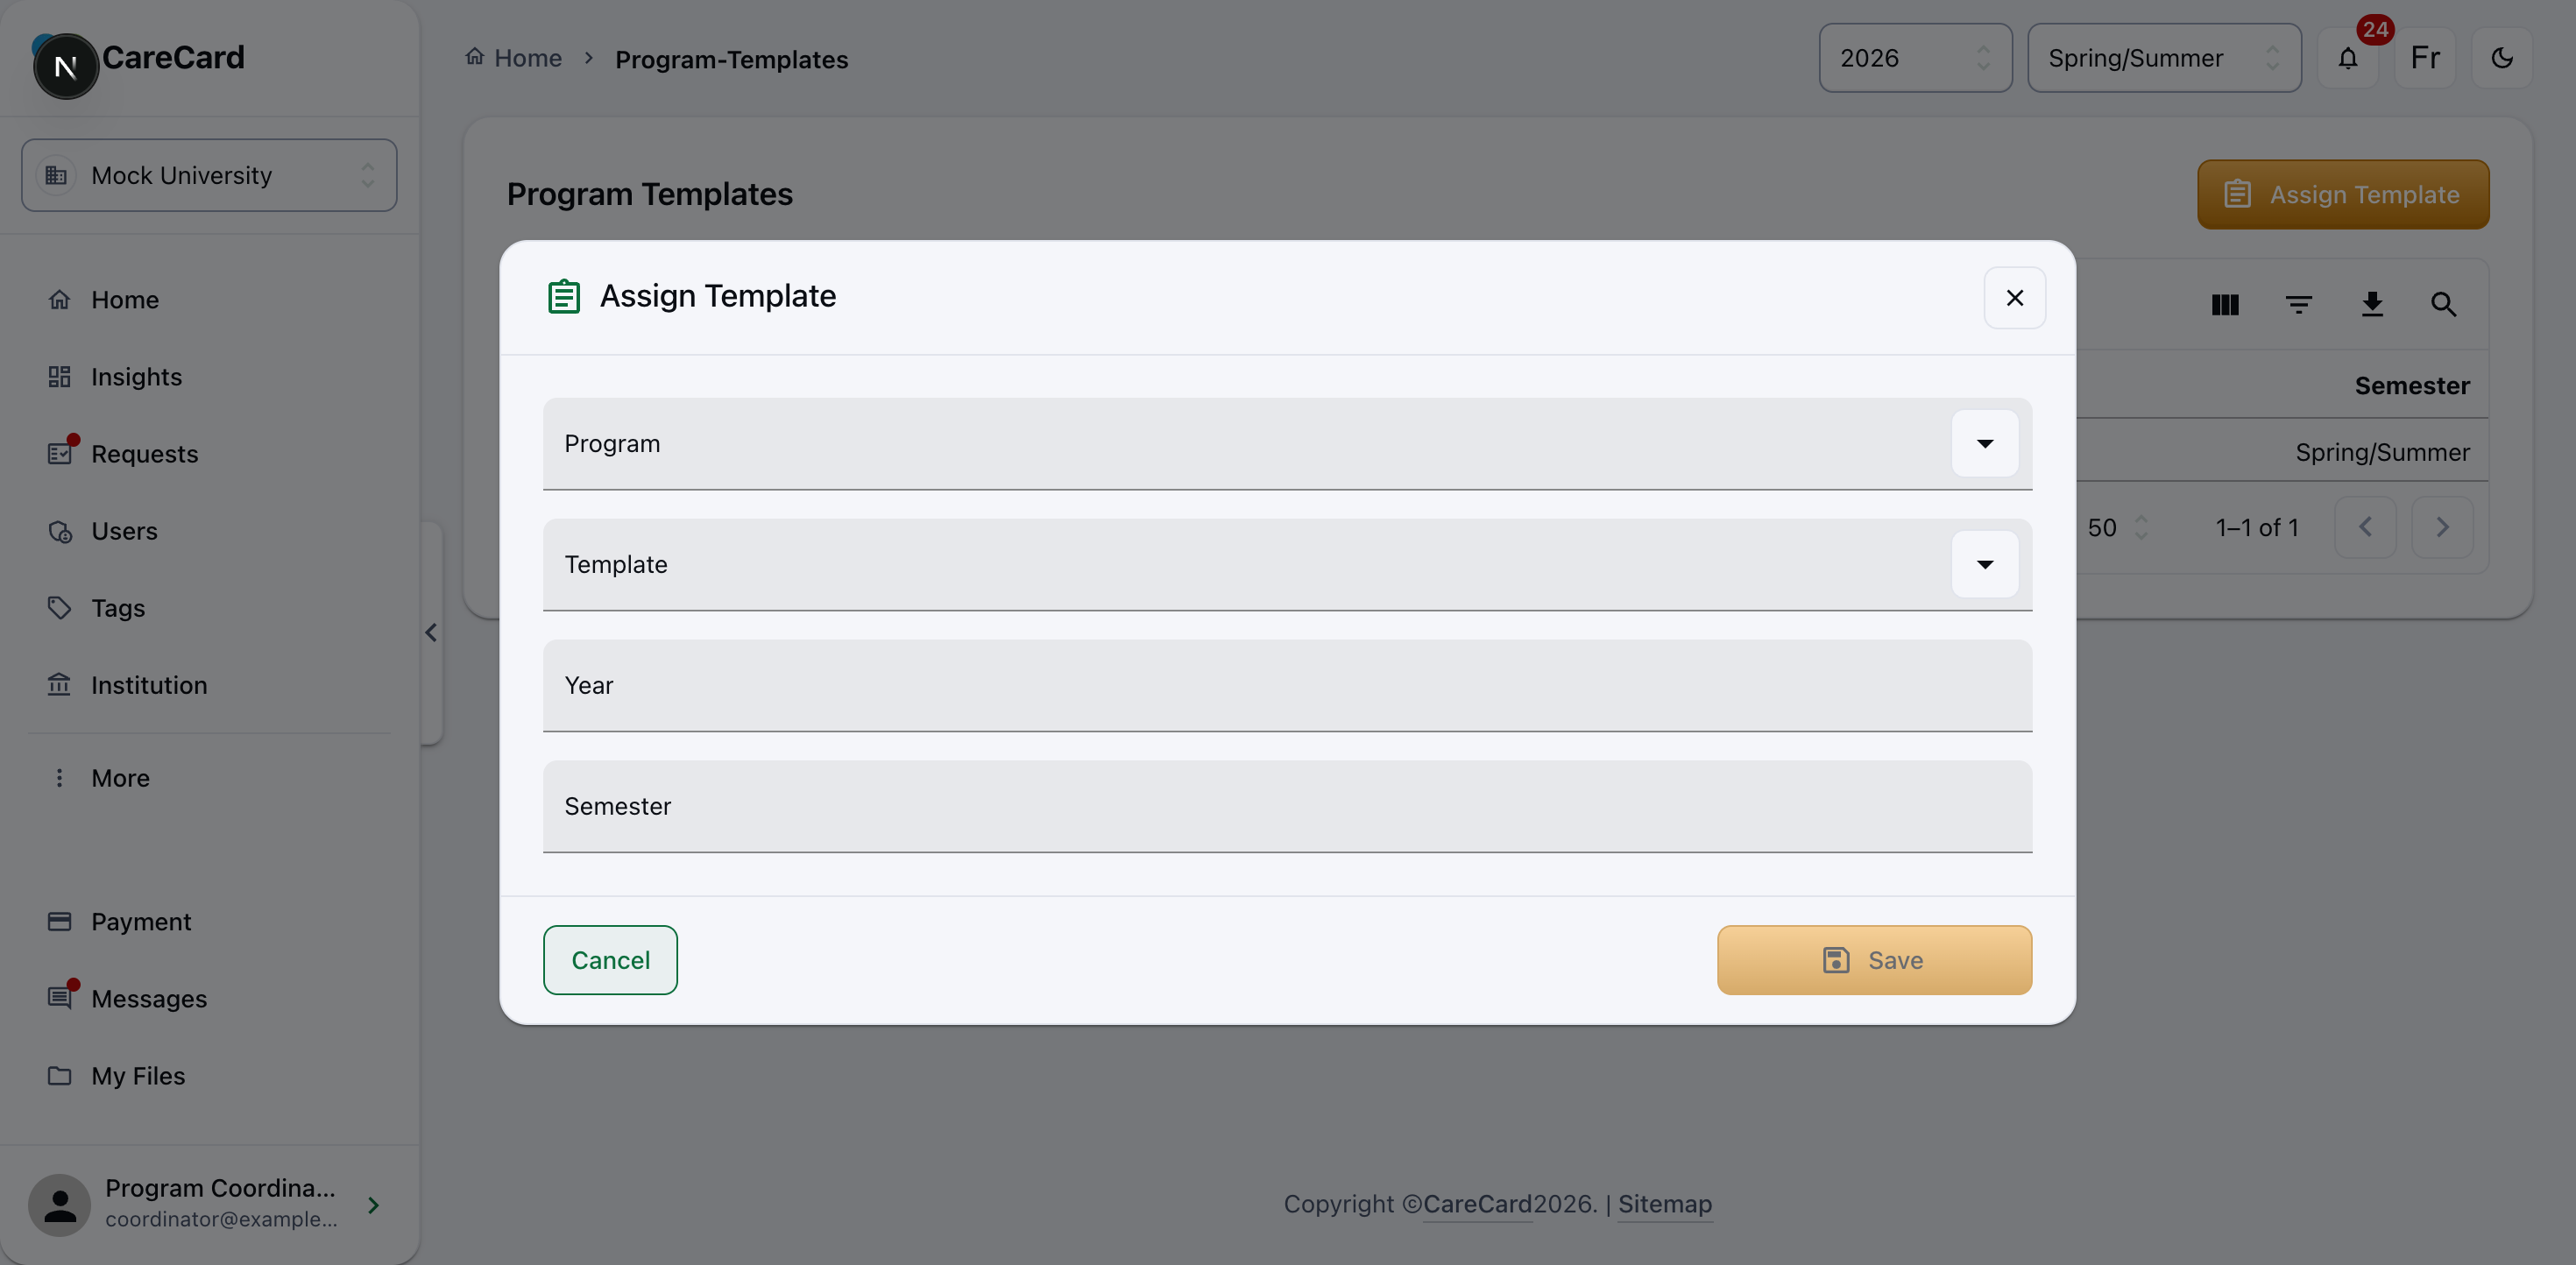
From that point, students admitted to that program for that term see those requirements on their Requirements page.
Assignments are per term. Assign the template again for each new year or semester. Without an assignment, students see an empty requirements list for that term.
Programs are read-only for you
Programs shows each program's details, but you can only view them. Creating and editing programs, and adding terms, belong to Institution and Campus Admins.
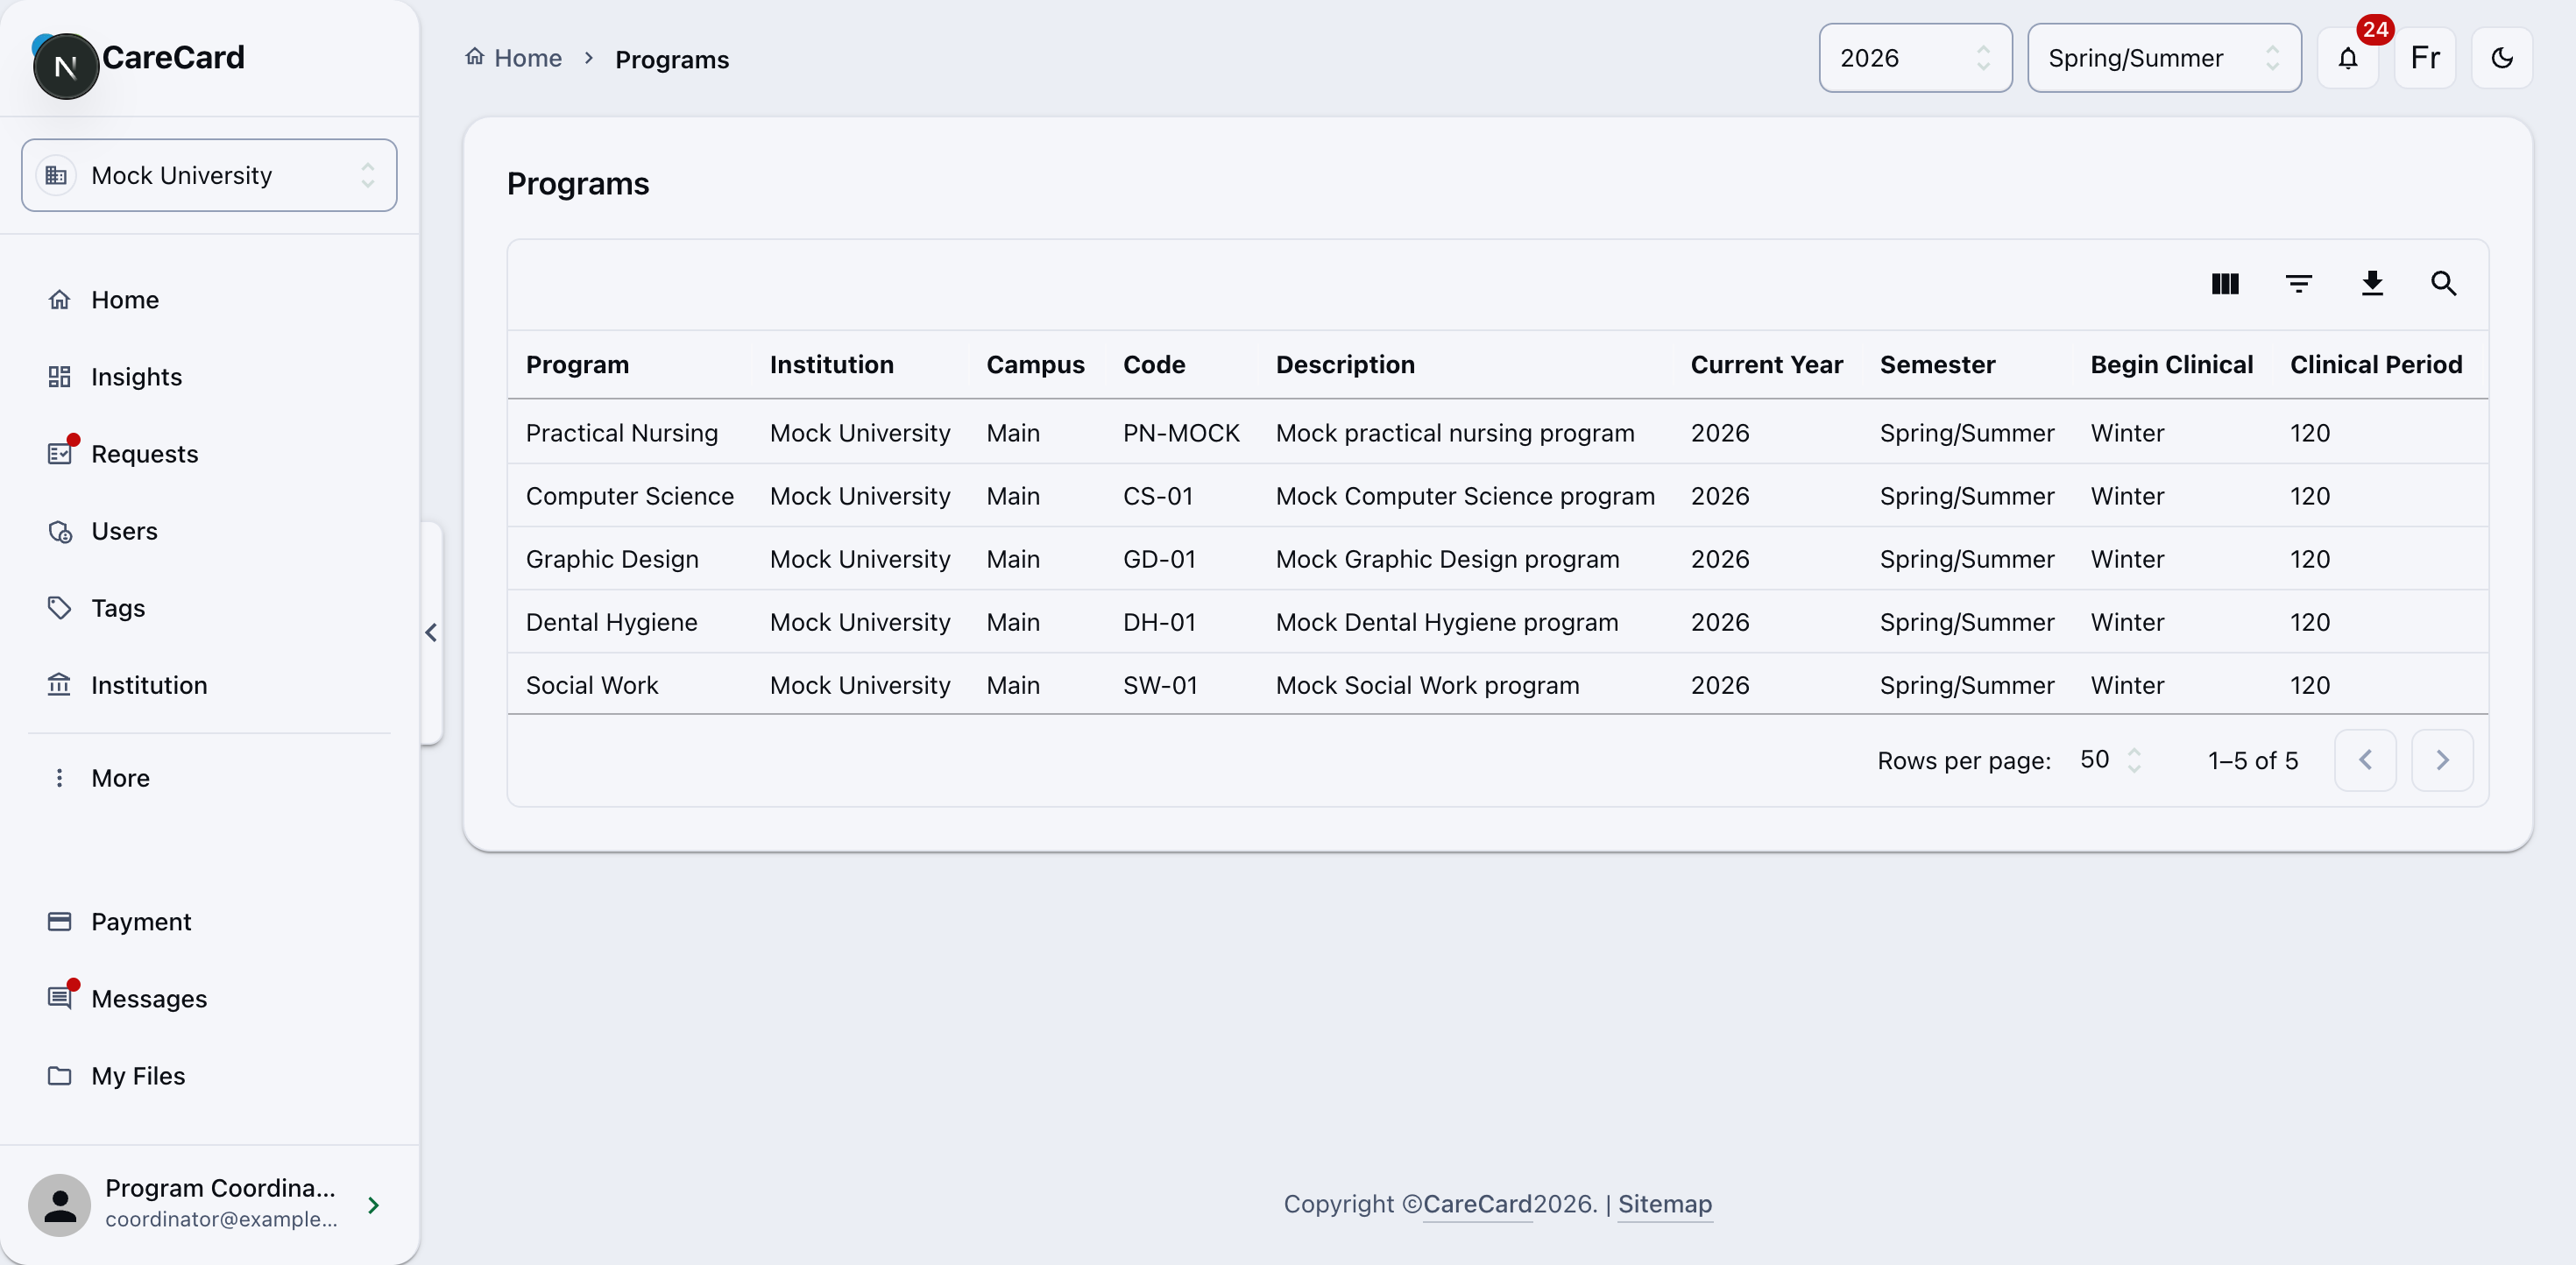
If a program or term you need doesn't exist, ask your Institution or Campus Admin to add it.
Next
Once the checklist exists, set up student access: Pre-Approving Students and Reviewing Institution Access Requests.